How to Start a WordPress Blog: Step-by-Step Guide for Beginners
Some links on this page are affiliate links. If you buy through them we may earn a commission, at no extra cost to you. It never changes our verdict. How we test and make money
On this page
Short answer: To start a WordPress blog, pick a niche, buy hosting with a domain, install WordPress, fix five basic settings, add a fast theme and a few core plugins, then publish posts that answer real questions. With Hostinger Premium the whole setup costs $1.99 a month on the 48-month term and takes about an hour.
Most guides on how to start a WordPress blog stop after the install. That is the easy part. The hard part is the small decisions in the first week: which plan, which settings, which plugins, and what to write first. Get those right and your blog is fast, safe and ready for Google from day one.
This guide walks through the exact steps I use when I set up a new WordPress blog. Every screenshot comes from a real WordPress install, and every price comes from the vendor page.
How to start a WordPress blog: what you need first
- A topic you can write at least 50 posts about.
- A domain name, such as yourblog.com. Hostinger includes one free for the first year on its WordPress plans.
- Web hosting, the server that stores your site. This guide uses Hostinger.
- About one hour for the setup, and a few hours for your first post.
You do not need to code. Everything below is done with clicks inside your hosting panel and the WordPress dashboard.
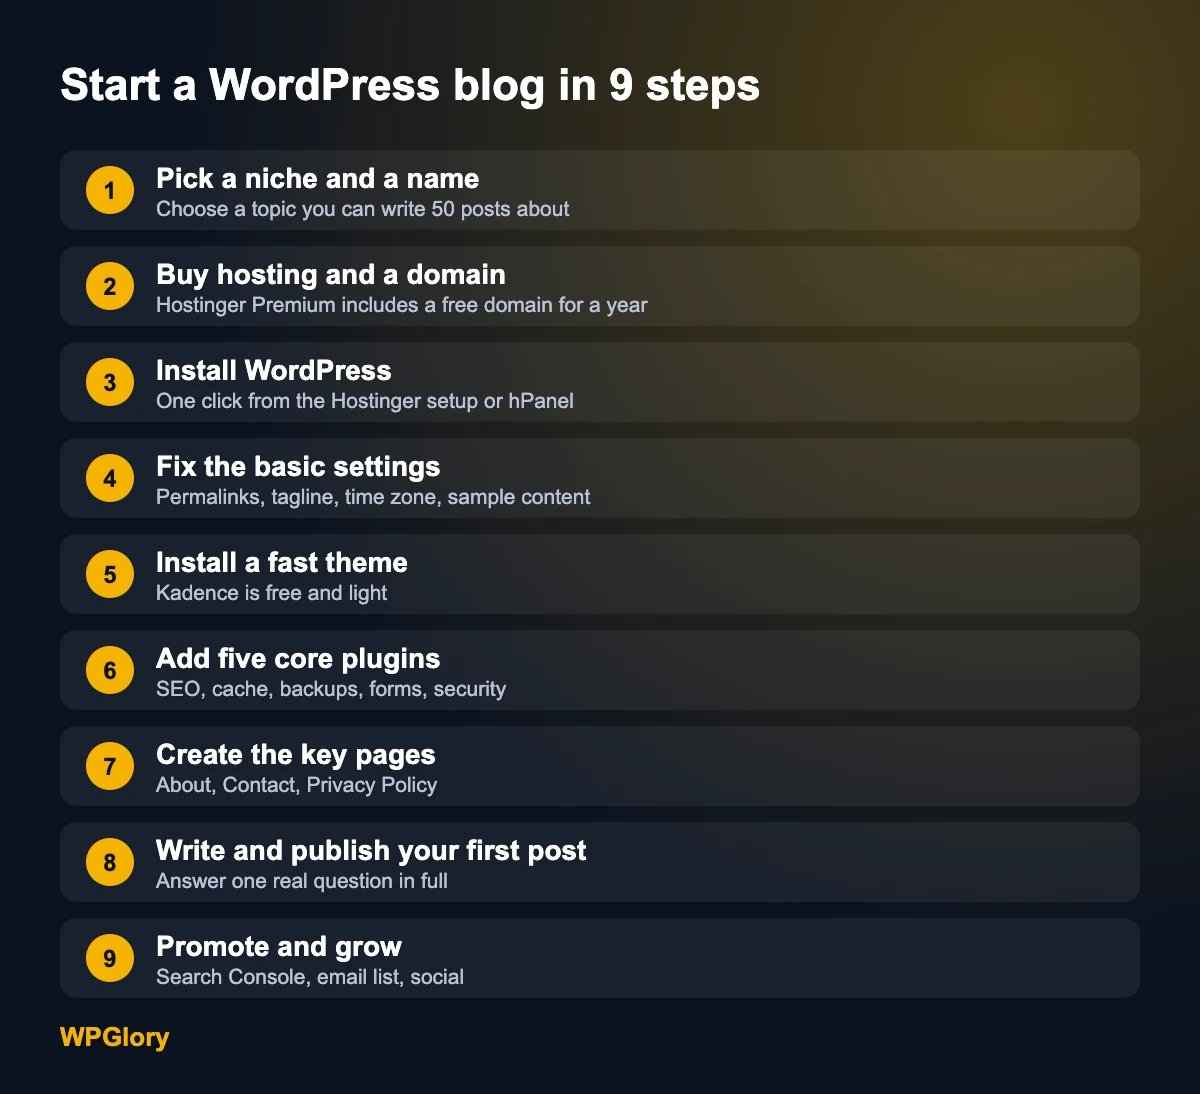
Step 1: Choose a niche and a blog name
A niche is the topic of your blog. Pick one that is narrow enough to stand out but wide enough for many posts. “Cooking” is too wide. “Quick vegetarian dinners for busy parents” gives you a clear reader and hundreds of post ideas.
A quick test: write down 20 post titles. If you get stuck at 10, the niche is too small. Then search a few of those titles on Google. If big brands own every result, narrow the topic again.
For the name, keep it short, easy to spell and free of hyphens. A .com is still the safest choice. Check that the matching social handles are free too.
Step 2: Get web hosting and a domain
Your host decides how fast your blog loads and how much you pay every year. For a new blog I recommend Hostinger. It is cheap to start, it runs on LiteSpeed web servers with built-in caching, and it installs WordPress for you.
Here are the three Hostinger plans that make sense for a blog. I took these numbers from the Hostinger pricing page on the 48-month term.
| Plan | First term | Renews at | Websites | Storage | Backups |
|---|---|---|---|---|---|
| Premium | $1.99/mo ($95.52 for 48 months) | $10.99/mo | 3 | 20 GB SSD | Weekly |
| Unlimited | $2.79/mo ($133.92 for 48 months) | $16.99/mo | Unlimited | 50 GB NVMe | Daily |
| Cloud Startup | $7.99/mo ($383.52 for 48 months) | $25.99/mo | Unlimited | 100 GB NVMe | Daily and on demand |
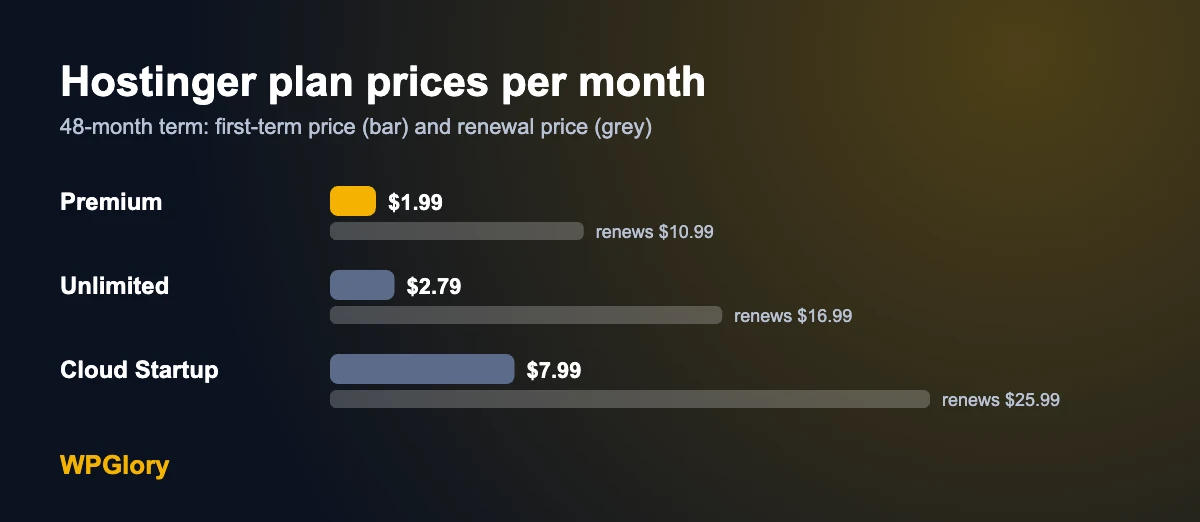
Which plan should you pick? Premium is enough for a new blog. It covers three sites, a free domain and free SSL. Move to Unlimited when you want daily backups or more than three sites. Cloud Startup is for blogs that already get a lot of traffic.
Tip: The low price only applies when you pay for the full term up front. A longer term locks in the low price for longer, so 48 months is the best value if you are serious about the blog. You also get 30 days to ask for a refund if it is not for you.
Hostinger vs other popular hosts for a new blog
I compared the entry plans of four hosts that beginners often look at. All prices come from each host’s own pricing page this month. The terms differ, so look at both the first-term price and the renewal price.
| Host and plan | First term | Renews at | Term for that price | Websites | Storage |
|---|---|---|---|---|---|
| Hostinger Premium | $1.99/mo | $10.99/mo | 48 months | 3 | 20 GB SSD |
| Bluehost Starter | $4.24/mo | $11.99/mo | 12 months | 10 | 10 GB |
| SiteGround StartUp | $2.99/mo | $17.99/mo | 12 months | 1 | 10 GB |
| DreamHost Launch | $2.89/mo | $10.99/mo | First year | 25 | 25 GB NVMe |
Hostinger has the lowest first-term price, and its renewal price is in the same range as the others. The long 48-month term is what keeps your cost low for four years, while Bluehost and SiteGround lock their sale price for only the first year. SiteGround has daily backups even on its smallest plan, but it hosts one site and renews at a much higher price. For a first blog on a small budget, Hostinger gives the best mix of price, speed features and an easy setup.
If you are building a site for a business rather than a personal blog, read my full best web hosting for small business comparison.
How to buy the plan
- Open the Hostinger WordPress hosting page and choose Premium.
- Pick the 48-month term to get the lowest monthly price.
- Create your account and pay.
- Claim your free domain in the setup screen, or connect a domain you already own.
Step 3: Install WordPress
Hostinger installs WordPress as part of the setup. After you pay, the onboarding asks what you want to build. Choose a WordPress site, pick a username and a strong password for your WordPress admin, and let the installer finish. It takes a few minutes.
If you skipped the setup, open hPanel, go to Websites, click Add website and choose WordPress. Your free SSL certificate is added for you, so your blog loads on https from the start.
When the install is done, log in at yourdomain.com/wp-admin. This is your WordPress dashboard, where you will do everything else.
Step 4: Fix the basic WordPress settings
Do these five changes before you write anything. They take ten minutes and they are painful to fix later.
- Permalinks: go to Settings, Permalinks and choose Post name. Your URLs become
yourblog.com/my-first-post/, which is clean and good for SEO. - Site title and tagline: go to Settings, General. Replace the default tagline with one short line about your blog.
- Time zone: set your city on the same screen so scheduled posts go out on time.
- Sample content: delete the “Hello world!” post, the Sample Page and the sample comment.
- Discussion: under Settings, Discussion, turn on “Comment must be manually approved” to stop spam from going live.
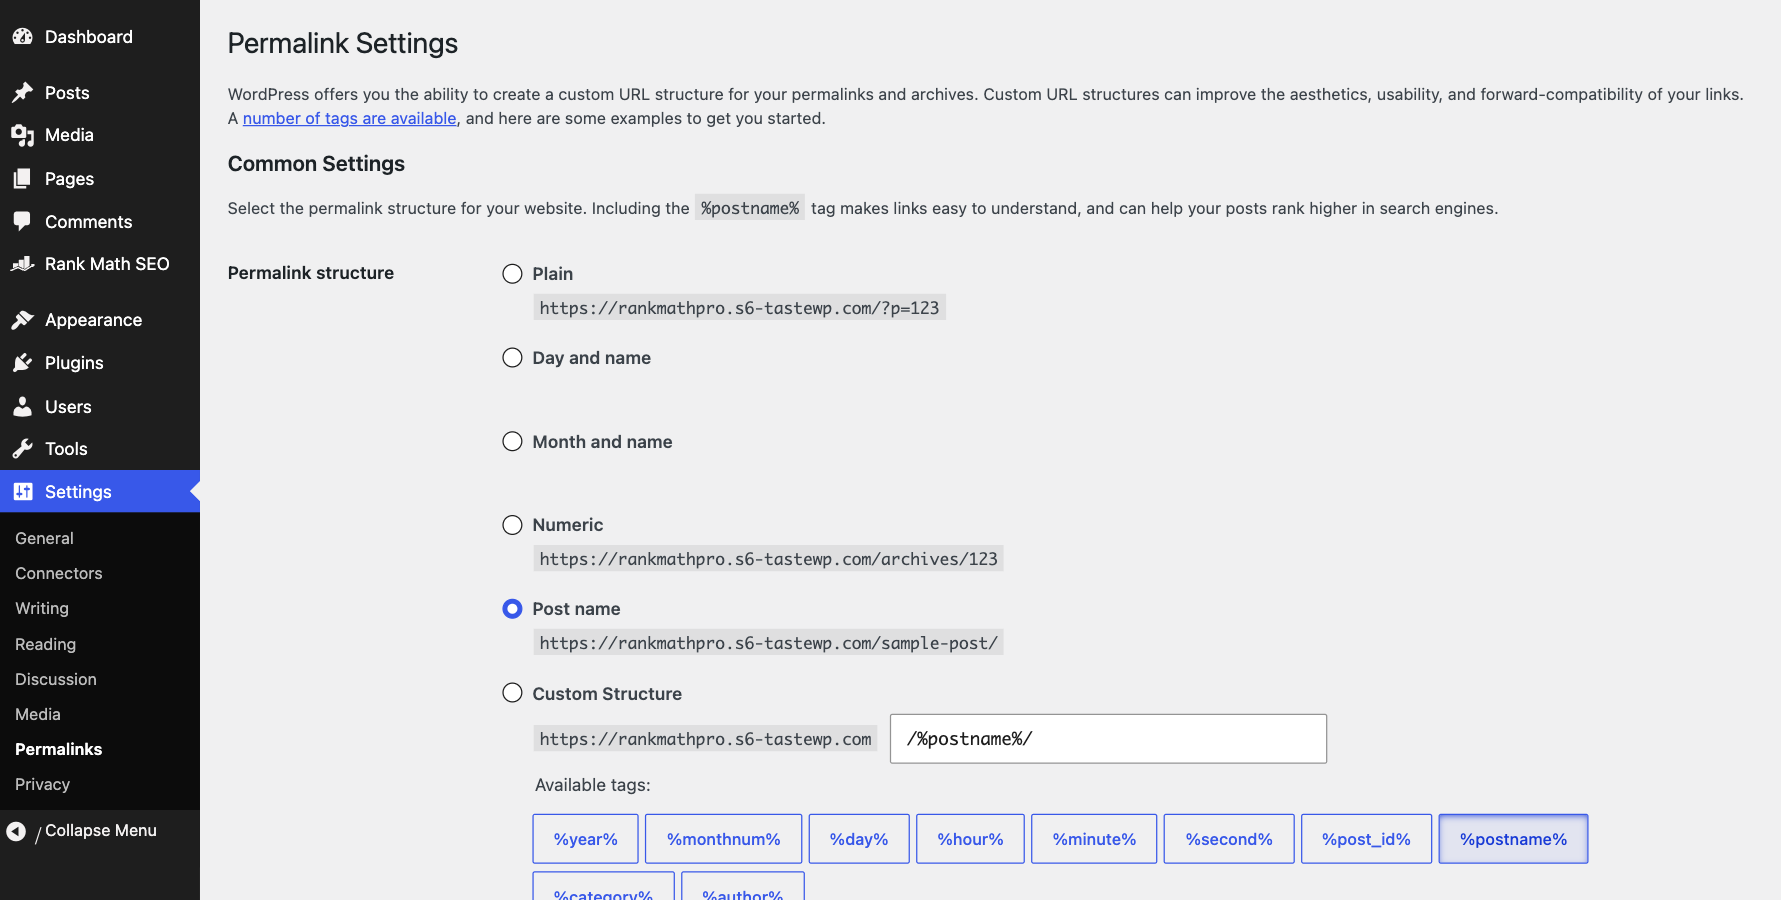
Why permalinks first? Changing the structure later changes every URL on your blog. Links people shared and pages Google indexed would break unless you add redirects. Set it once, now.
Step 5: Install a fast, free theme
Your theme controls how the blog looks. Pick a light theme so your pages load fast. I use Kadence on WPGlory. The free version gives you a header and footer builder, global colors and fonts, and starter templates.
Go to Appearance, Themes, click Add New Theme, search for Kadence, then click Install and Activate.
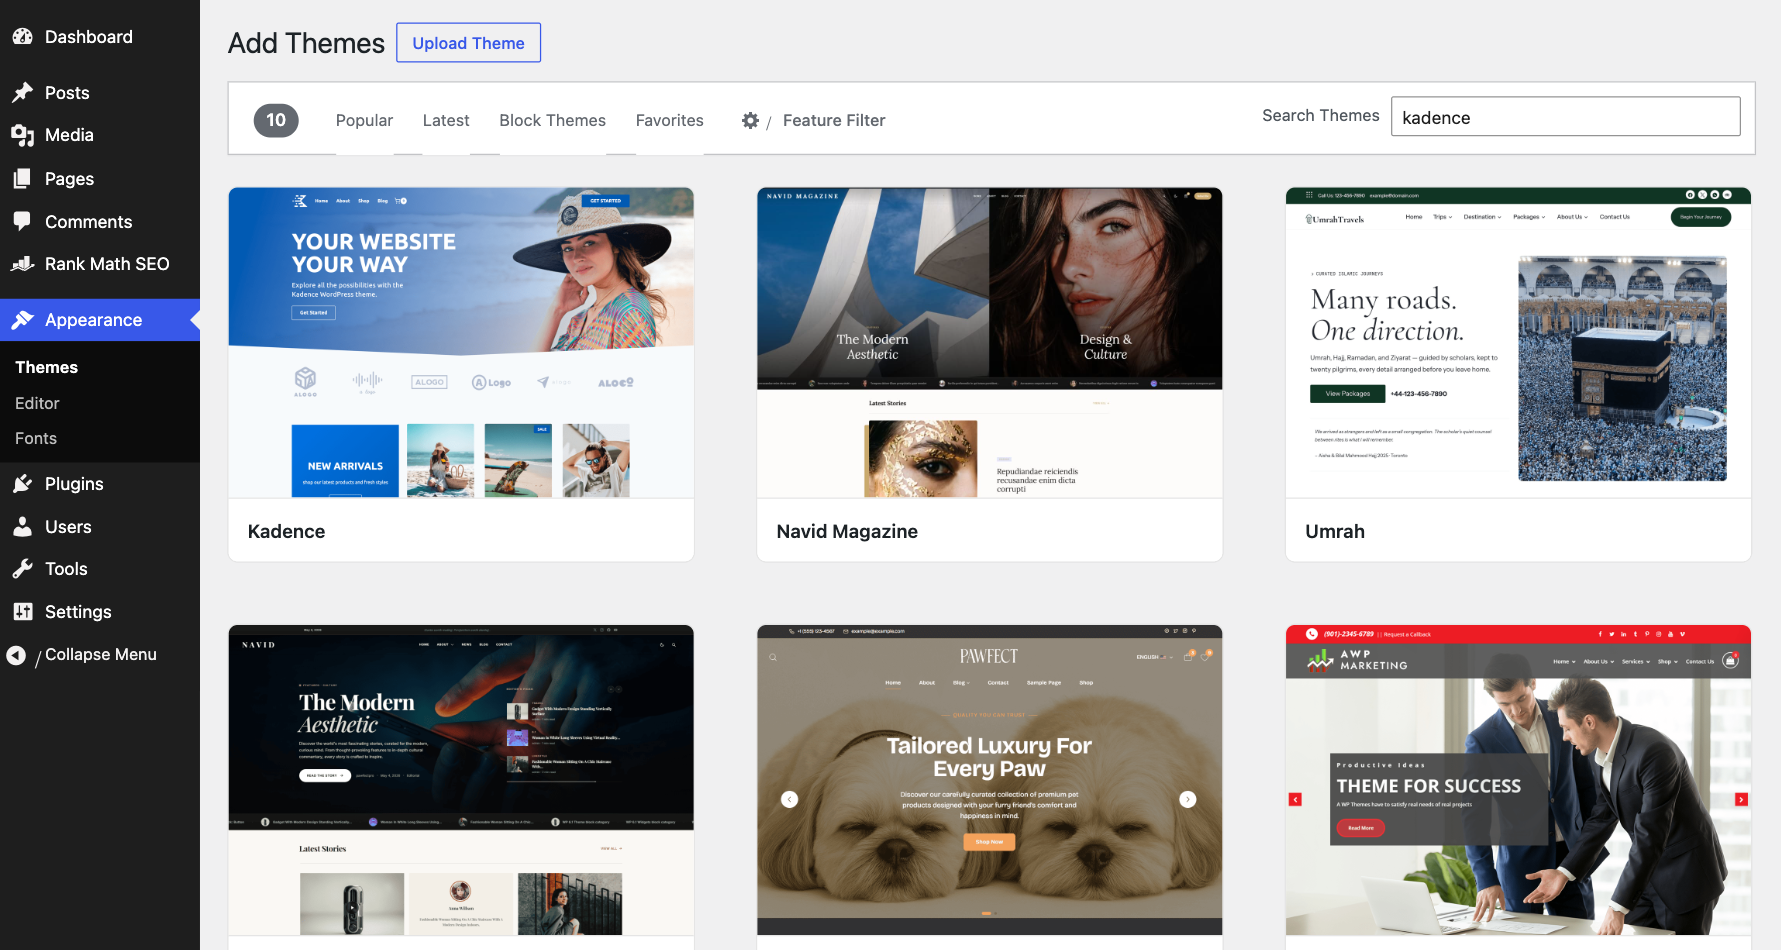
Then open Appearance, Customize and set three things: your logo, your brand color and a readable body font size of 17 to 18 pixels. Keep the design simple. Readers come for the content.
Step 6: Install the core plugins
Plugins add features. Every plugin also adds code, so install only what you need. These five cover almost every new blog:
| Job | Plugin | Why |
|---|---|---|
| SEO | Rank Math | Titles, meta descriptions, sitemaps and schema. The free version is enough to start. |
| Speed | LiteSpeed Cache | Free and built for the LiteSpeed servers Hostinger uses. Page cache, image and CSS optimization. |
| Backups | UpdraftPlus | Scheduled backups to Google Drive or Dropbox, on top of the host backups. |
| Forms | Fluent Forms | A fast contact form. The free version is enough for a contact page. |
| Security | Wordfence | Firewall, malware scan and login protection. |
To install one, go to Plugins, Add New Plugin, search for the name, click Install Now and then Activate.
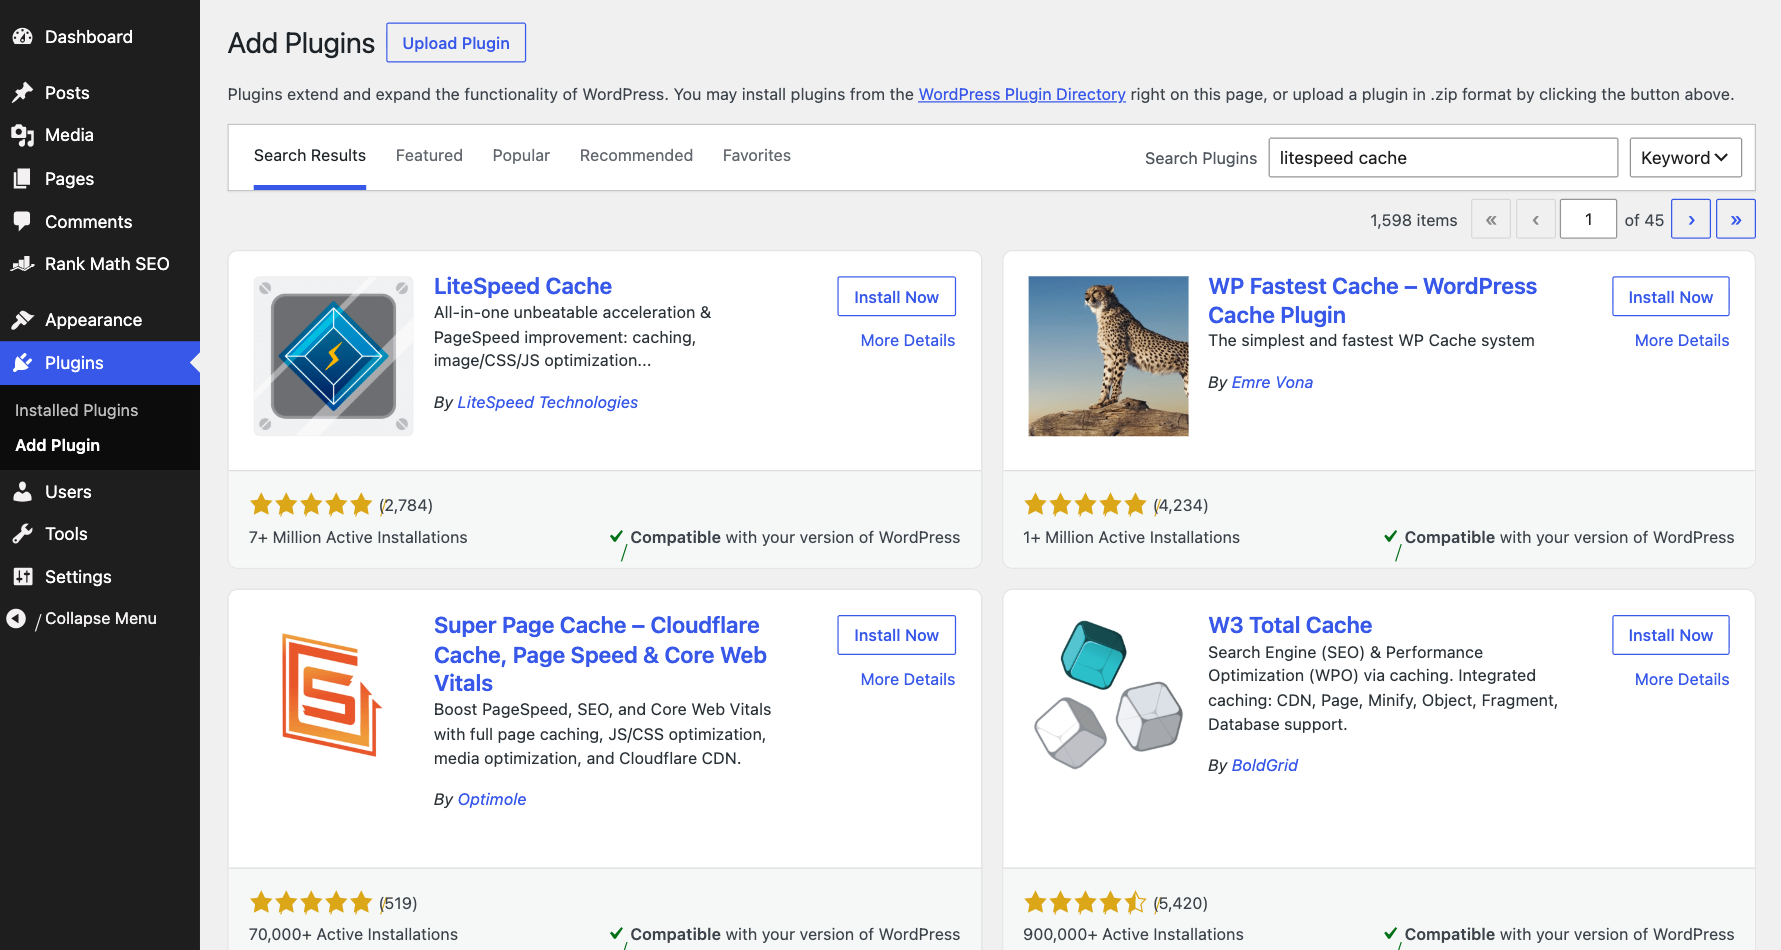
Set up LiteSpeed Cache in a few minutes
On Hostinger, LiteSpeed Cache talks directly to the server cache, so it is the best free speed plugin you can use there. After you activate it, open LiteSpeed Cache, Presets and apply the Basic or Advanced preset. Then test your homepage and a post while logged out. If something looks broken, go back to a lighter preset. Do not run a second page cache plugin next to it, because two caches fight each other and make problems hard to debug.
When you edit a post and the change does not show up for visitors, purge the cache from the LiteSpeed menu in the admin bar. You can also clear the server cache in hPanel. The same idea fixes most “my changes are not showing” problems, which I cover in my TablePress data not updating guide.
Next, run the Rank Math setup wizard. My Rank Math setup guide shows every screen. If you want to compare SEO plugins first, read Rank Math vs Yoast vs AIOSEO.
Step 7: Create your key pages
Every blog needs four pages. Create them under Pages, Add New Page:
- About: who you are, why the blog exists and who it is for.
- Contact: add your Fluent Forms contact form here.
- Privacy Policy: WordPress includes a draft under Settings, Privacy. Edit it to match the plugins you use.
- Start here (optional): links to your best posts for new readers.
Add About and Contact to your main menu under Appearance, Menus, or in the Kadence header builder.
Step 8: Write and publish your first post
Your first post should answer one real question your reader types into Google. Start with a question you already know well, then make your answer the most complete one on the first page of results.
- Pick one keyword. For example “how to make cold brew at home”. Put it in the title, the first paragraph and the URL.
- Answer first. Give the short answer in the first two or three lines, then explain.
- Use headings. One H2 per main step or question. Readers scan before they read.
- Add your own proof. Photos, screenshots, numbers or a short story from your own experience.
- Link out and in. Link to one or two trusted sources and to your other posts.
- Fill in the SEO box. In the Rank Math panel, add the focus keyword, an SEO title and a meta description. Aim for a green score.
Go to Posts, Add New Post, write in the block editor, set a featured image and a category, then click Publish. Aim for one solid post a week for the first three months. Consistency beats volume.
Step 9: Promote your blog and get your first readers
- Google Search Console: add your site and submit the sitemap Rank Math creates at
/sitemap_index.xml. This is how Google finds your posts. - Google Analytics: connect it with the free Site Kit plugin to see which posts people read.
- An email list: add a simple sign-up form from day one. Email readers come back. See my list of free newsletter plugins.
- Social and communities: share each post where your readers already hang out, such as a Facebook group, Reddit or Pinterest, and follow each community’s rules.
How to make money from your blog
Once you have steady traffic, these are the common ways to earn:
- Affiliate links: recommend tools you use and earn a commission. Use a link manager such as ThirstyAffiliates. I compare it with Pretty Links in this test.
- Display ads: Google AdSense to start, ad networks once your traffic grows.
- Your own products: ebooks, courses or templates. See my LMS plugin comparison if you plan a course.
- Services: freelance writing, consulting or coaching in your niche.
Always add a clear disclosure when a post has affiliate links. It is required in many countries and it builds trust.
Mistakes to avoid with a new blog
- Too many plugins. Each one slows the site and adds risk. Remove what you do not use.
- No backups. Turn on UpdraftPlus before you publish. Hostinger Premium only keeps weekly backups.
- Ignoring renewal prices. Budget for the renewal price, not only the first term.
- Changing permalinks later. Set Post name on day one.
- Writing for everyone. A narrow reader gets you to your first 1,000 visitors faster.
- Never updating. Update WordPress, the theme and plugins every week.
Frequently asked questions
How much does it cost to start a WordPress blog?
WordPress itself is free. You pay for hosting and a domain. With Hostinger Premium on the 48-month term, hosting is $1.99 a month ($95.52 up front) and the domain is free for the first year. The plan renews at $10.99 a month. A free theme and free plugins are enough to start.
Is WordPress.org the same as WordPress.com?
No. WordPress.org is the free software you install on your own hosting, which is what this guide covers. WordPress.com is a hosted service with its own plans and limits. Self-hosted WordPress gives you full control over plugins, themes and monetization.
Can I start a WordPress blog for free?
You can test WordPress for free on a local install or a temporary test site, but a real blog with your own domain needs paid hosting. Cheap shared hosting is the lowest-cost way to run a blog you control.
Which Hostinger plan is best for a new blog?
Premium. It hosts up to three websites, includes a free domain for one year, free SSL and weekly backups. Upgrade to Unlimited when you need daily backups or more sites.
How long does it take to start a WordPress blog?
About an hour for hosting, WordPress, settings, theme and plugins. Your first good post will take a few more hours.
How long before a new blog gets traffic from Google?
It usually takes several months of regular posting before search traffic grows. Publish helpful posts every week, submit your sitemap in Search Console and build internal links between your posts.
Sources
- Hostinger WordPress hosting plans and prices
- WordPress.org: Settings, Permalinks screen
- Kadence theme on WordPress.org
- LiteSpeed Cache on WordPress.org
- Google Search Central: SEO starter guide
Final verdict
Start your WordPress blog with Hostinger
For a new blog, Hostinger Premium is the cheapest solid start: $1.99 a month on the 48-month term with a free domain, free SSL, LiteSpeed caching and one-click WordPress. Set your permalinks, install Kadence and five core plugins, and publish your first helpful post this week.